 |  | |
| HomePrev | Part XI. Circulation | Next |
|---|
Table of Contents
Only staff members may create reservations. A reservation can be started from a patron record, or a booking resource. To reserve catalogued items, you may start from searching the catalogue, if you do not know the booking item’s barcode.
1) Retrieve the patron’s record.
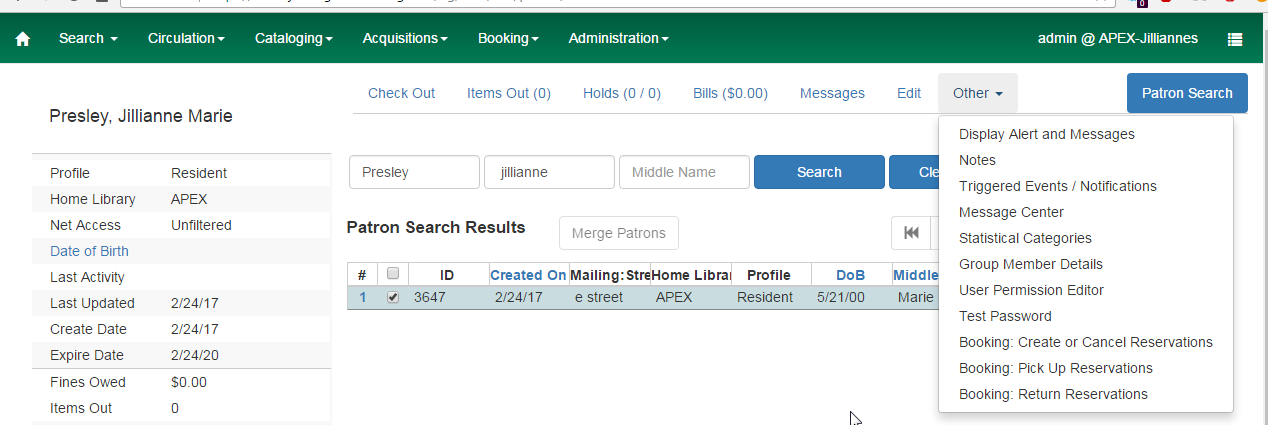
2) Select Other -→ Booking -→ Create or Cancel Reservations. This takes you to the Reservations Screen.
3) For non-catalogued items, choose a Bookable Resource Type and click Next. For catalogued items, enter the barcode in Enter the barcode of a catalogued, bookable resource box, then click Next beside the box.
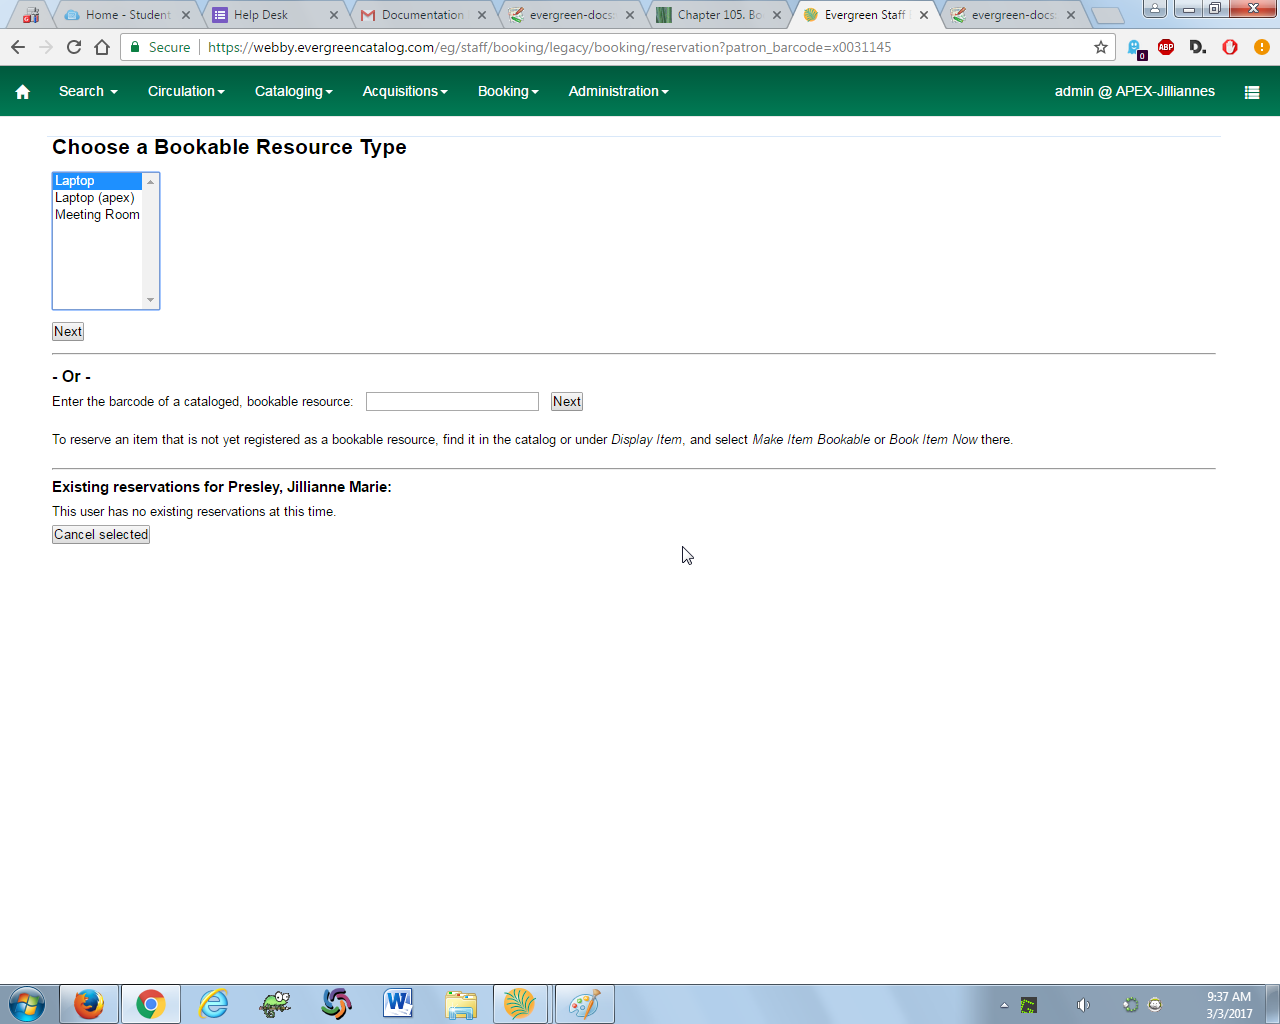
4) For non-catalogued resources, the Bookable Resource Type and the items associated with the type will appear.
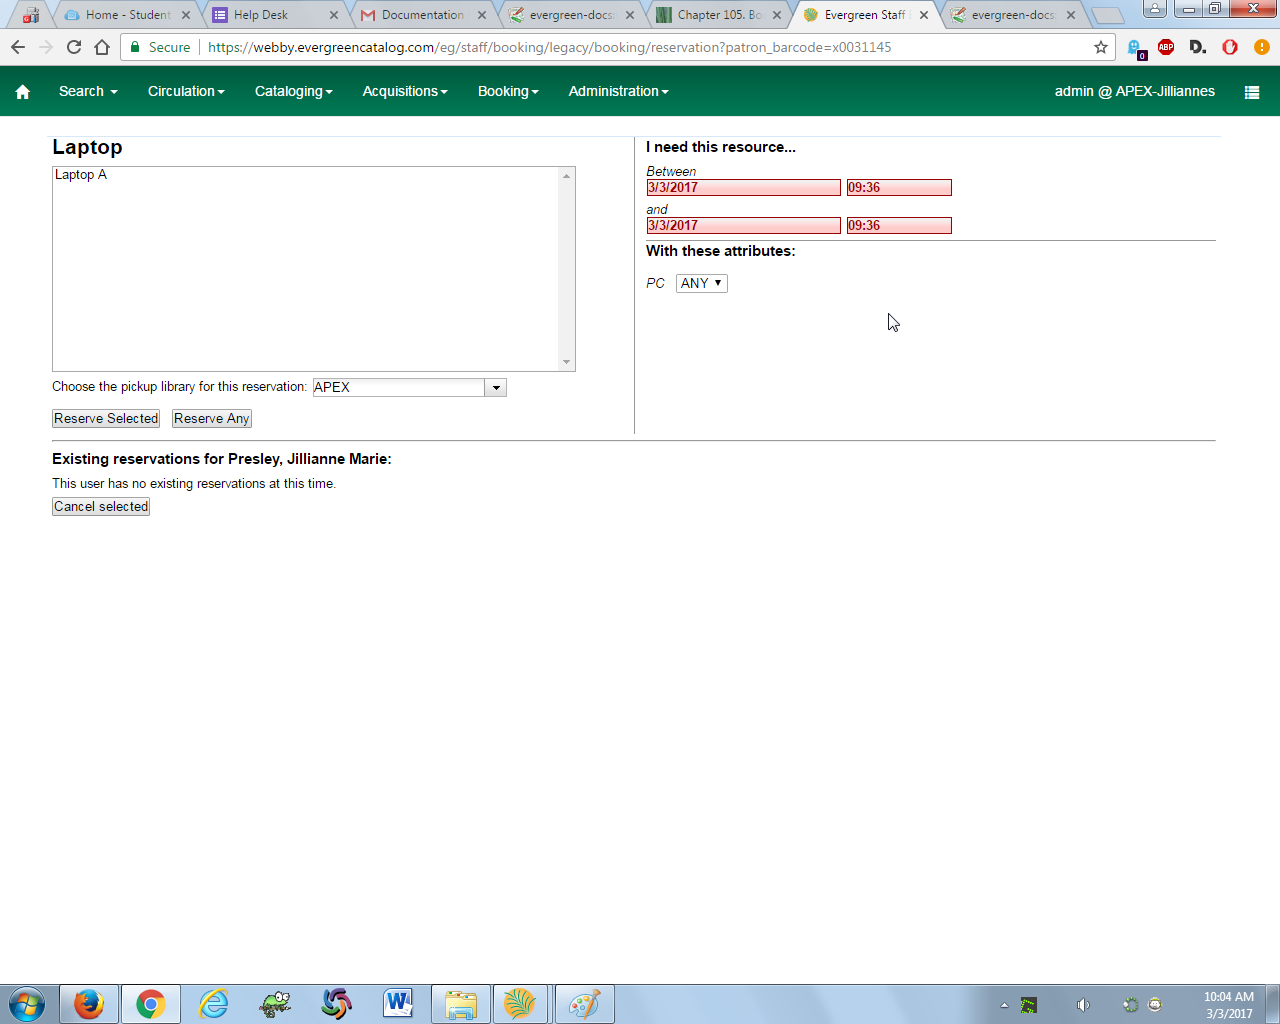
For catalogued items, the title and the item will display in the box.
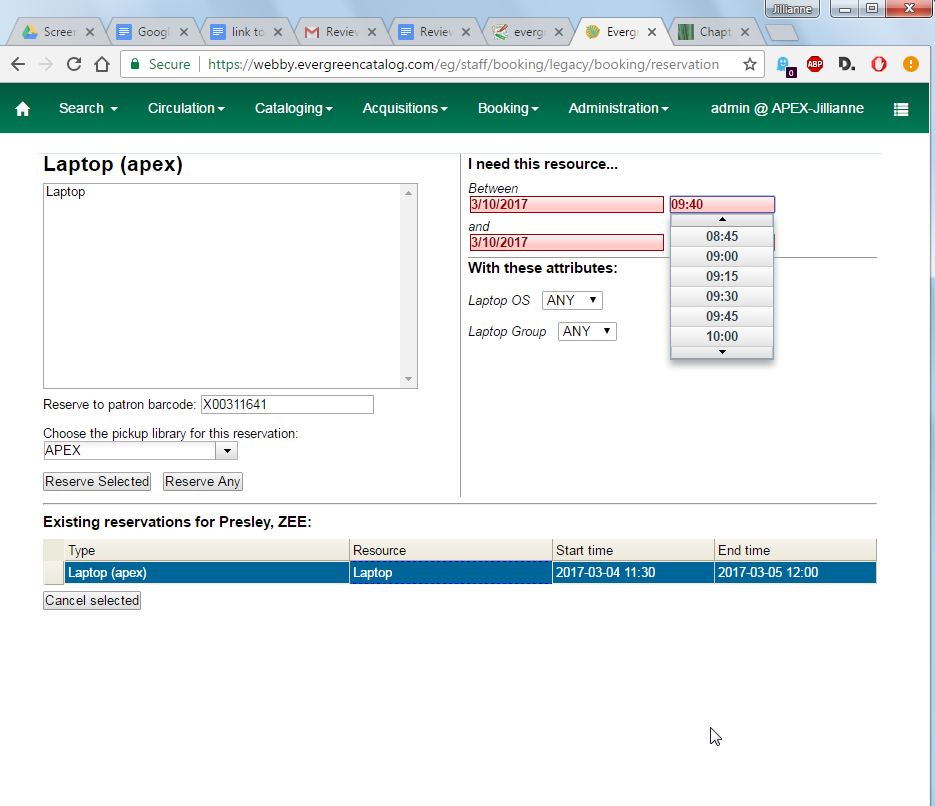
5) Select the date and time for the reservation in I need this resource… area. Click the date field. A calendar widget will be displayed for you to choose a date. Click the time field to choose time from the dropdown list.
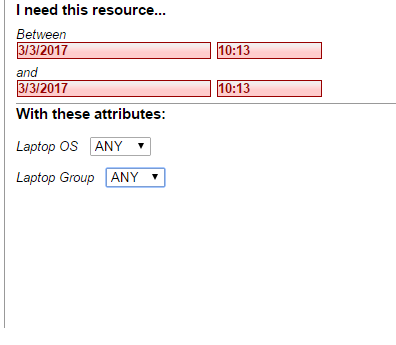
If incorrect date and time is selected, the date/time boxes will appear in red. For example, if the time for which the reservation is set has already passed, the boxes will appear in red. There must be at least 15 minutes between the creation of the reservation and the start time of the reservation.
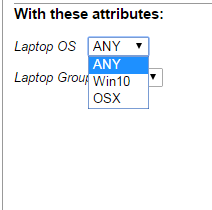
6) For non-catalogued resources, patrons may specify special feature(s), if any, of the resource. With these attributes: allows you to do so. For example, if a patron is booking a laptop he/she can choose between PC and Mac and even choose a specific operating system if they need to. Click the drop down arrow to select your option from the list.
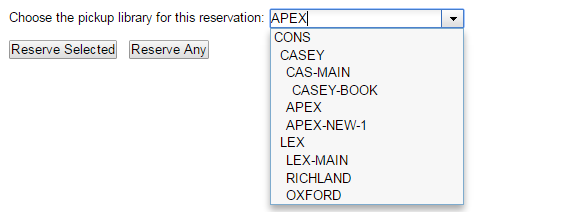
7) Select the pickup location from the dropdown list.
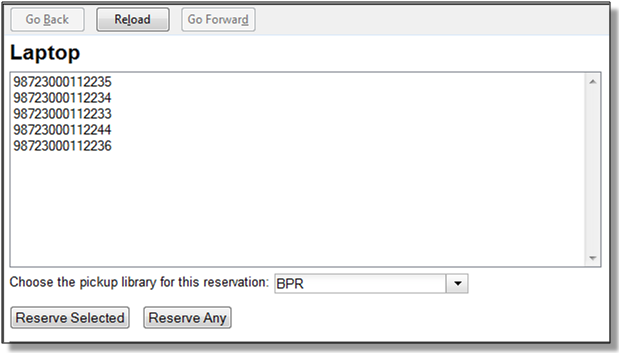
8) If there are multiple copies of the resource and any item listed is acceptable, click Reserve Any. To choose a specific item, select it and then click Reserve Selected.
9) A message will confirm that the action succeeded. Click OK on the prompt.
10) The screen will refresh and the reservation will appear below the patron’s name at the bottom of the screen.
You need to know the barcode of the patron when you create a reservation for him/her from a booking resource.
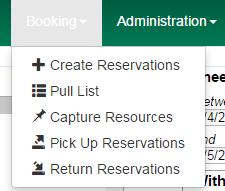
1) From the Booking menu, select Create Reservations
2) Choose a Bookable Resource Type and click Next or enter the barcode of a catalogued resource and click Next.

3) For non-catalogued resources, a screen showing the Bookable Resource Type and the items associated with the type will appear.
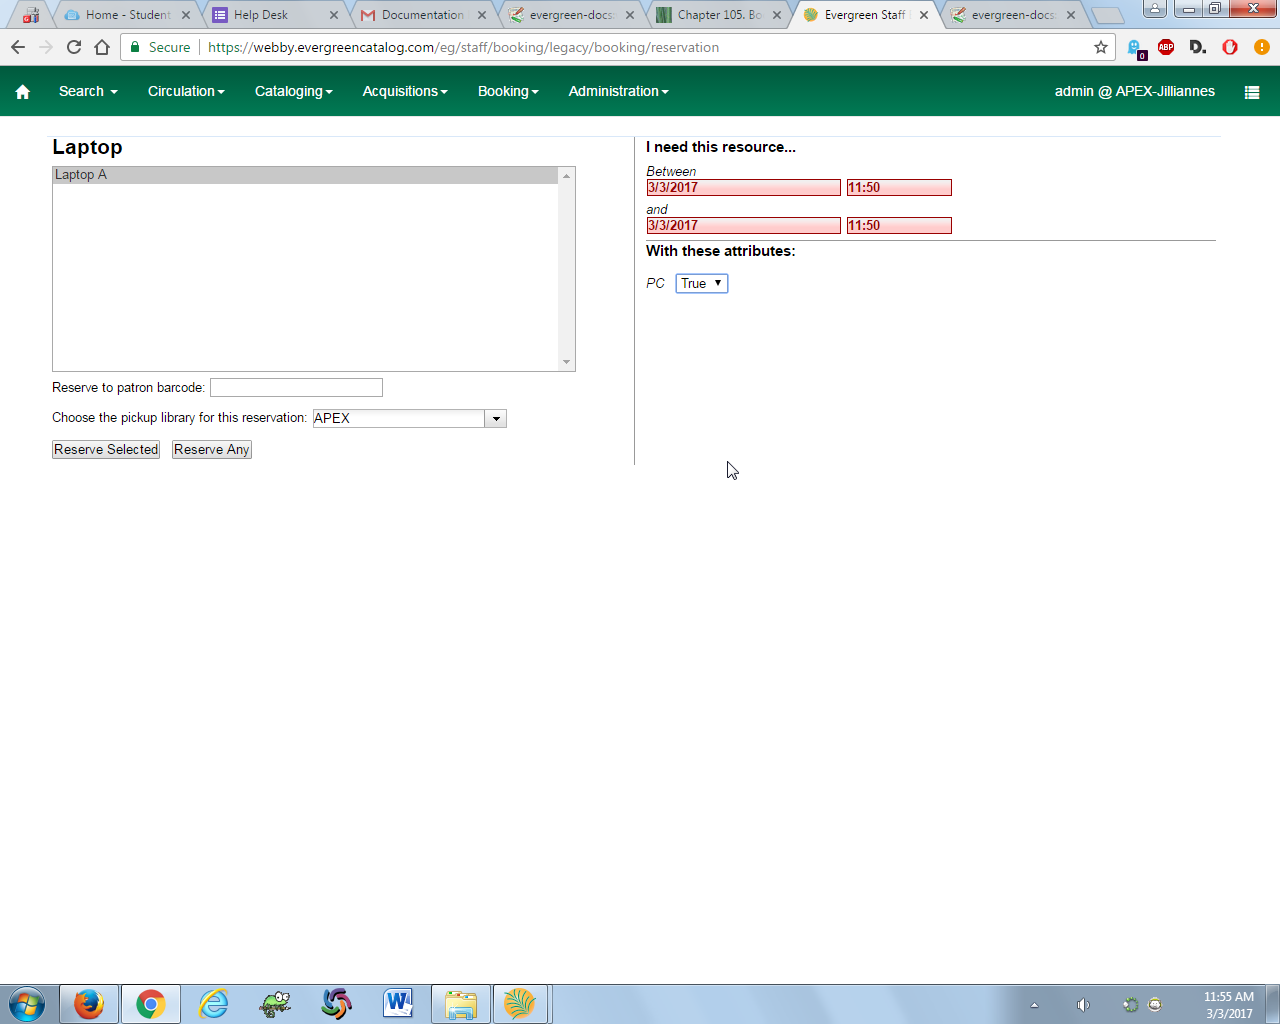
For catalogued resources, the title and item will appear.
4) Enter the user’s barcode in the Reserve to patron barcode box. The user’s existing reservations, if any, will appear at the bottom of the screen.
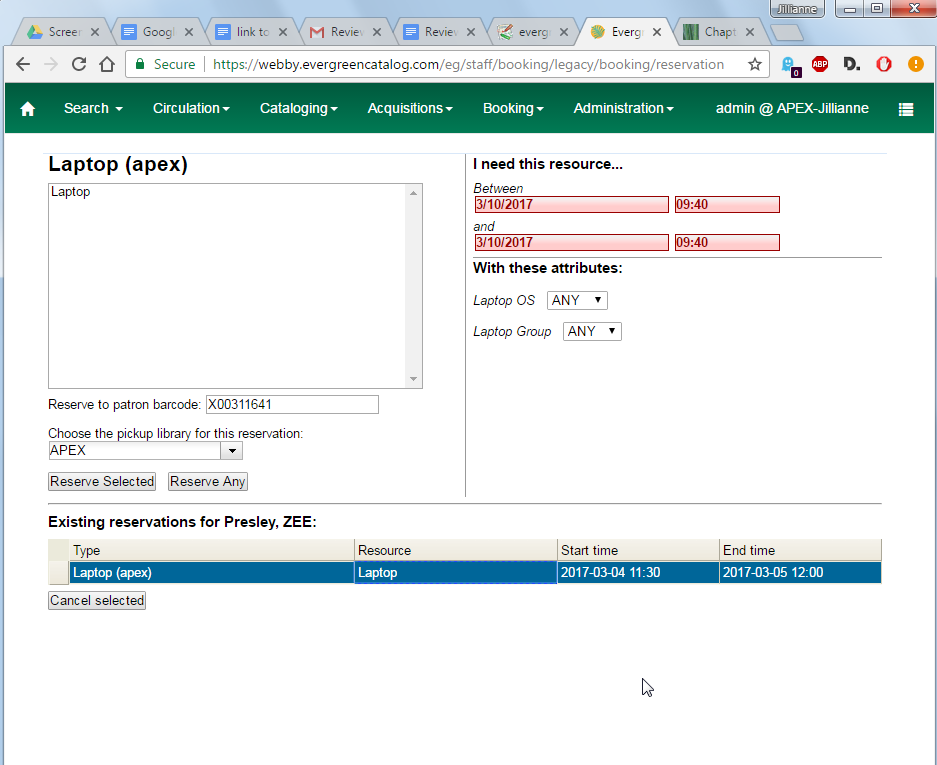
5) Select the date and time for the reservation in I need this resource… area. Click the date field. A calendar widget will be displayed for you to choose a date. Click the time field to choose time from the dropdown list.

If incorrect date and time is selected, the date/time boxes will appear in red. For example, if the time for which the reservation is set has already passed, the boxes will appear in red. The times must be set correctly for the reservation to be created. There must be at least 15 minutes between the creation of the reservation and the start time of the reservation.
6) For non-catalogued resources, patrons may specify special feature(s), if any, of the resource. The With these attributes: allows you to do so. For example, if a patron is booking a laptop they can choose between PC and Mac and even choose a specific operating system if they need to. Click the dropdown arrow to select your option from the list.

7) Select the pickup location from the dropdown list.

8) If there are multiple copies of the resource and any item listed is acceptable, click Reserve Any. To choose a specific item, select it and then click Reserve Selected.

9) A message will confirm that the action succeeded. Click OK on the prompt.
10) The screen will refresh and the reservation will appear below the patron’s name at the bottom of the screen.

If you would like to reserve a catalogued item but do not know the item barcode, you may start with a catalogue search.
1) In the staff client, select Cataloguing -→ Search the Catalogue or keyboard shortcut F3 to search for the item you wish to reserve. You may search by any bibliographic information.
2) Click the title to display the record summary. In the Copy Summary, select Copy Details in Actions column.
3) The Copy Details will appear in a new row. In the barcode column, click the book now link.
4) A screen showing the title and barcodes of available copies will appear.
5) Enter the user’s barcode in the Reserve to patron barcode box. The user’s existing reservations, if any, will appear at the bottom of the screen.
6) Select the date and time in I need this resource… section. If the date and time set is incorrect the boxes appear in red. For example, if the time for which the reservation is set has already passed, the boxes will appear in red.
7) Select pickup location. If there are multiple copies and any of the listed items is acceptable, click Reserve Any. To choose a specific item, select it and then click Reserve Selected.
8) A message will confirm that the action succeeded. Click OK on the prompt.
9) The screen will refresh, and the reservation will appear below the user’s name.
Reservations on catalogued items can be created on Item Status (F5) screen. Select the item, then Actions for Selected Items → Book Item Now.