| HomePrev | Chapter 43. Workstation Administration | Next | |
|---|---|---|---|
There are many default receipt templates included with the Evergreen staff client. These templates are saved on individual workstations. Customization can be done workstation by workstation or by exporting the templates to import to other workstations.
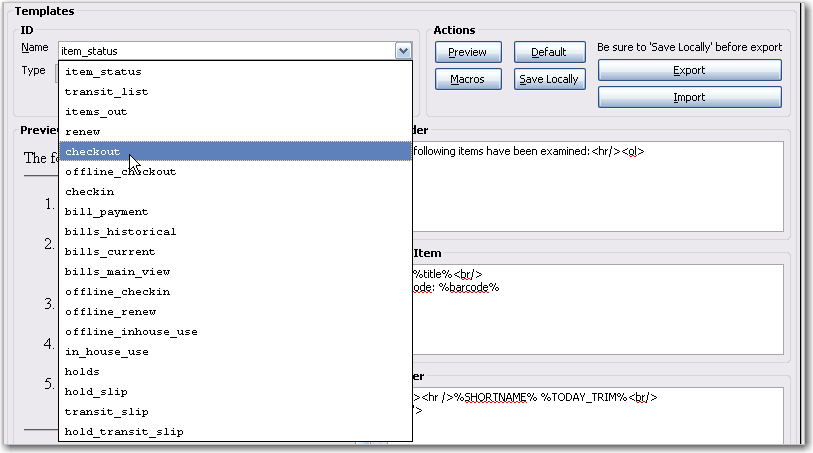
Select the checkout template from the dropdown menu.
This is what the default checkout template looks like. The template preview is on the left hand side. You can edit the Header, Line Item or Footer on the right hand side.
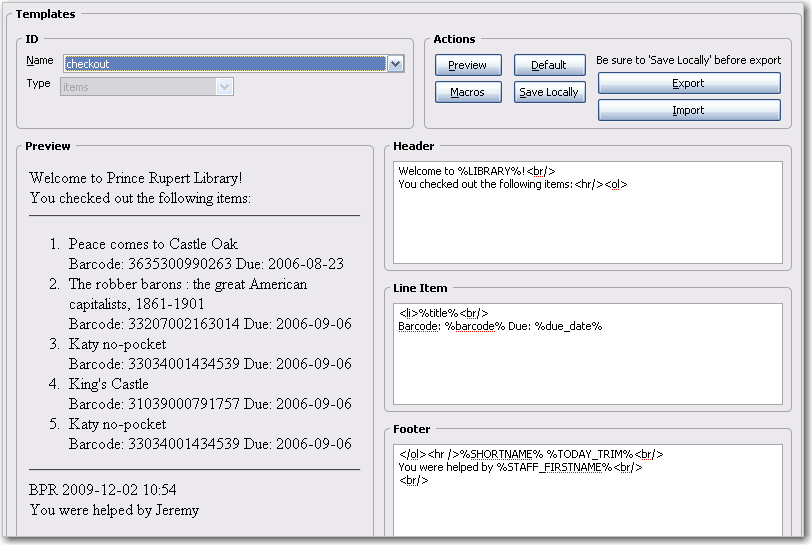
In the upper right hand corner you can see the available macros by clicking on the Macros button. A macro prints a real value from the database. In this example, the macro %LIBRARY% prints “Prince Rupert Library”. The macros that are available vary slightly between types of receipt templates (i.e. bills, holds, items).
Receipt templates are marked up with HTML tags. You may use most HTML tags. See http://www.w3schools.com/html/ for more information on HTML tags.
You may insert a link to an image, e.g. your library’s logo, that exists on the web. For example, to include the white Evergreen logo from this document, enter tag <img src=http://docs.evergreen-ils.org/2.3/media/small_logo_white.jpg>. in the receipt template.
There are several macros that can carry pre-built contents specific to individual libraries. The contents can be set up in local administration. For details see Library Settings. Though text can be hard-coded in receipt templates, the pre-built contents will be automatically applied to receipts printed from all workstations without editing each template.
Below are some example edits:

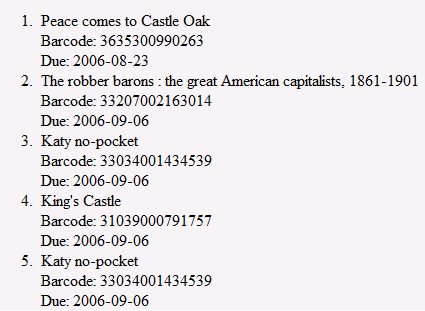
The above is the default Line Item in Checkout template. The macro %barcode% prints the item barcodes of the books that were checked out. The macro %due_date% prints the due date for each item that was checked out. You may add a line break between them: Barcode: %barcode% </br> Due: %due_date%
The receipt preview will look like this:
The due date can only be printed in the YYYY-MM-DD format.

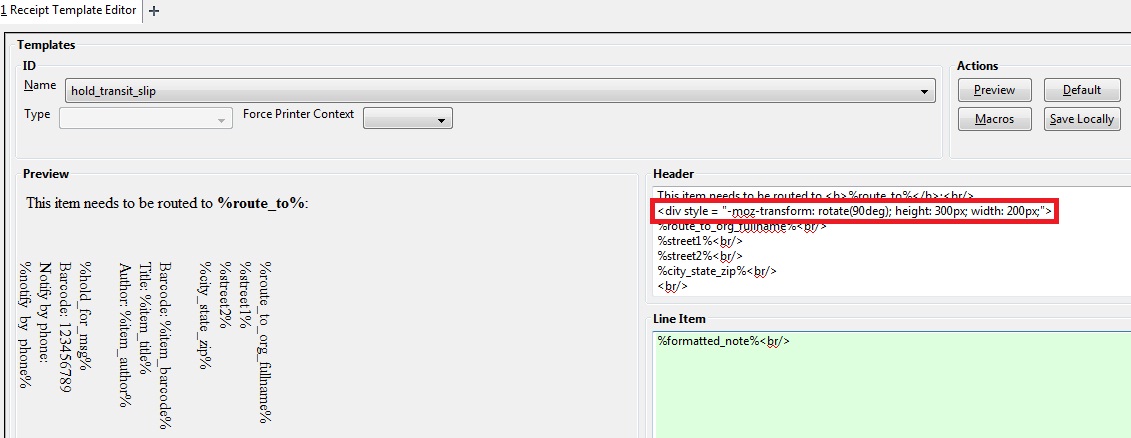
This feature enables you to use Mozilla-specific CSS to print holds with a landscape layout. To use the landscape layout:
Enter the stylesheet text in the <div> bracket that appears before the block of text that you wish to rotate:
<div style="moz-transform: rotate(90deg);">
You can further customize the look of the text by adjusting its height and width. The height and width that you specify will be unique to your printer. For example, you could add the following height and width to your rotated text:
<div style="moz-transform: rotate(90deg);height: 300px; width: 200px;">
The holds slip will print with the configured text in a landscape layout:
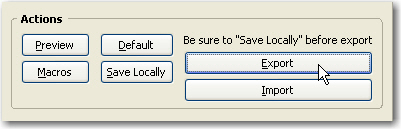
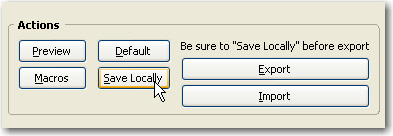
As you can only save a template on to the computer you are working on you will need to export the template if you have more than one computer that prints out receipts (e.g. more than one computers on the circulation desk, or another computer in the workroom that you use to checkin items or capture holds with).
Click on Export.
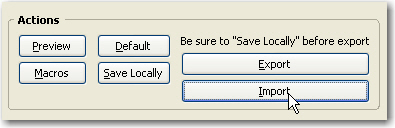
On Receipt Template Editor, Click Import.
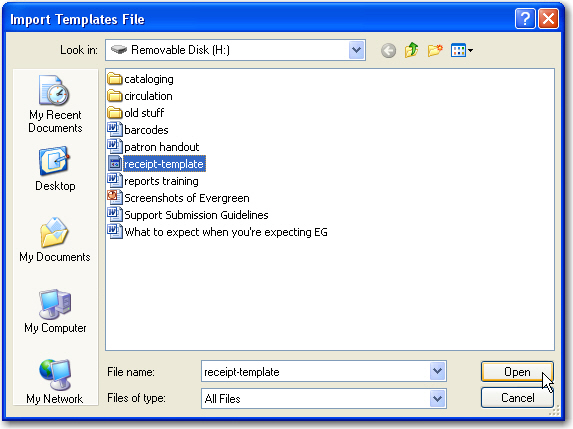
Navigate to and select the template file that you want to import. Click Open.
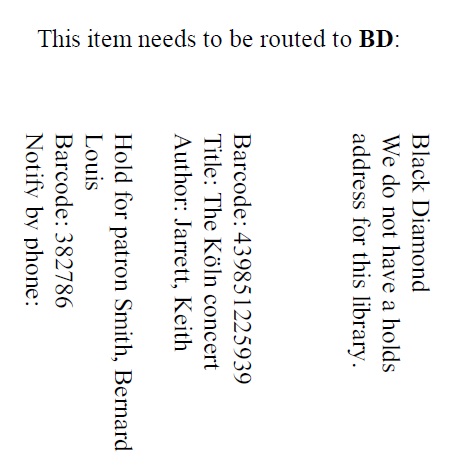
By default all libraries use shared and hard-coded templates for Hold Slip and Transit Slip. Libraries can switch to using their own templates by setting up a library setting: Use legacy hardcoded receipts/slips. Details see Library Settings.
To report a problem with this documentation or provide feedback, please contact the DIG mailing list.
© 2008-2015 GPLS and others. The Evergreen Project is a member of the Software Freedom Conservancy.
