| HomePrev | Chapter 21. Workstation Administration | Next |
|---|---|---|
There is an optional toolbar with buttons providing quick access to commonly used staff client functions. When activated the toolbar appears below the menu bar.
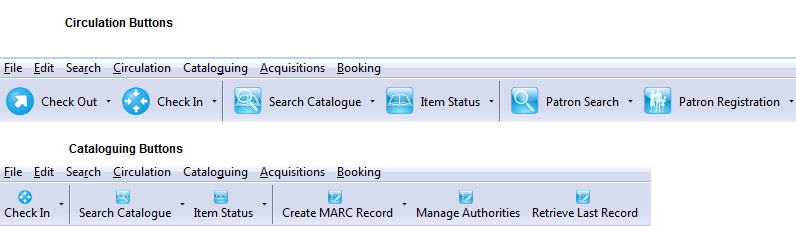
The look of the buttons can be customized. Use Mode, Label Position and Icon Size on the Toolbar menu shown on the screen below to select your preference.
A group of buttons can be selected or activated by default for all workstations at a particular library (see Library Settings for details). A different default group can be set up on individual workstations by the following steps.
Go to Admin → Workstation Adminitration → Toolbars → Current.
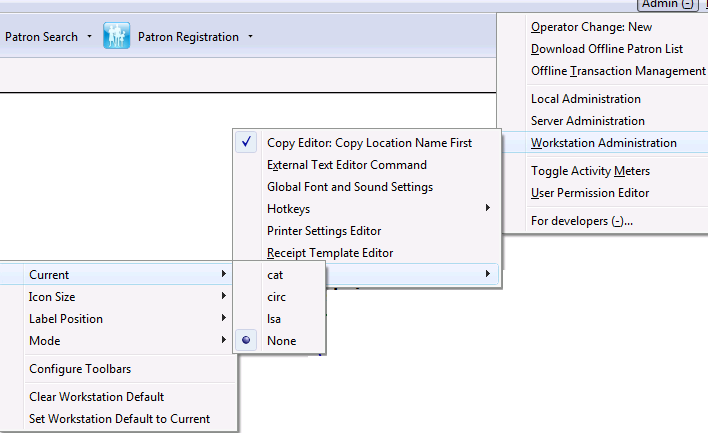
To clear an existing setting click Clear Workstation Default.
Circulation and Cataloguing are the default toolbar groups. Local system administrators can create new groups for individual accounts, workstations or all in a particular library.
Click New Toolbar
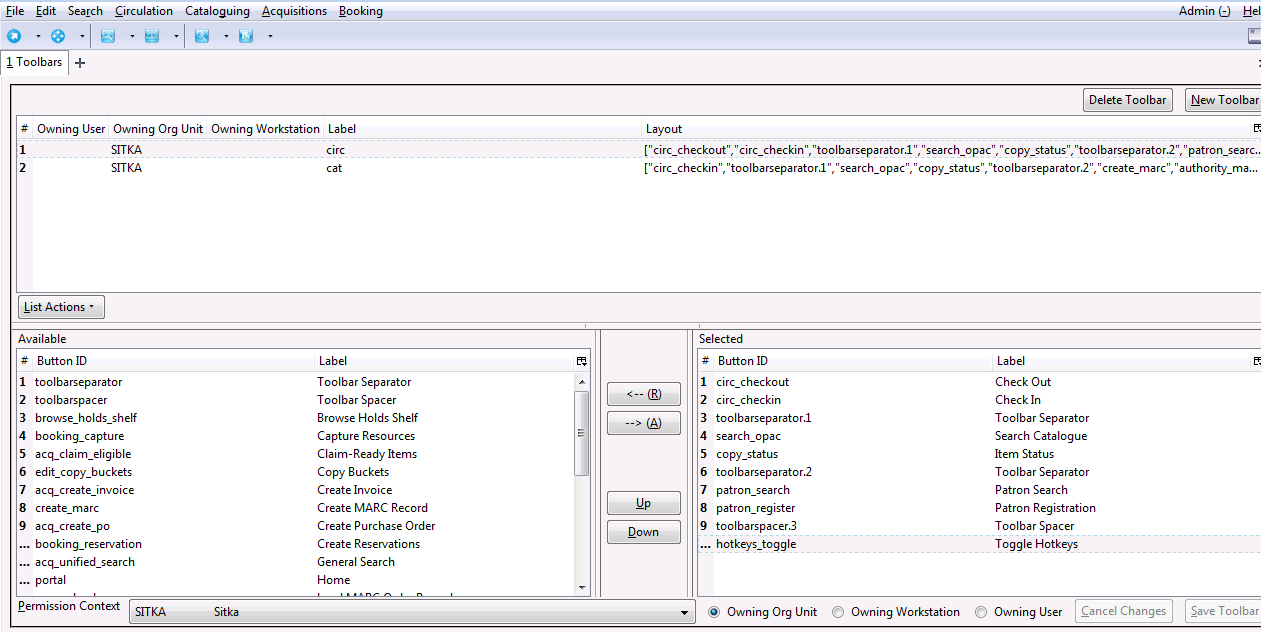
-->(A) to
add. You may select one in the Selected pane, and then click <--(R) to remove
it.